Header Match Rules
What are they?
Header match rules are rules that govern the request header properties. This allows you to mock out the different valid and invalid headers of API endpoints.
How do they work?
When you add a header match rule and response, this enables you to mock out what the response is to requests with these chosen header rules.
Creating a header match rule in the Designer
Once a new mockdefinition is generated, you start at the Endpoint Overview. This displays the available endpoints along with their verbs, endpoint path and if there are any existing scenarios.
Overview of the endpoints
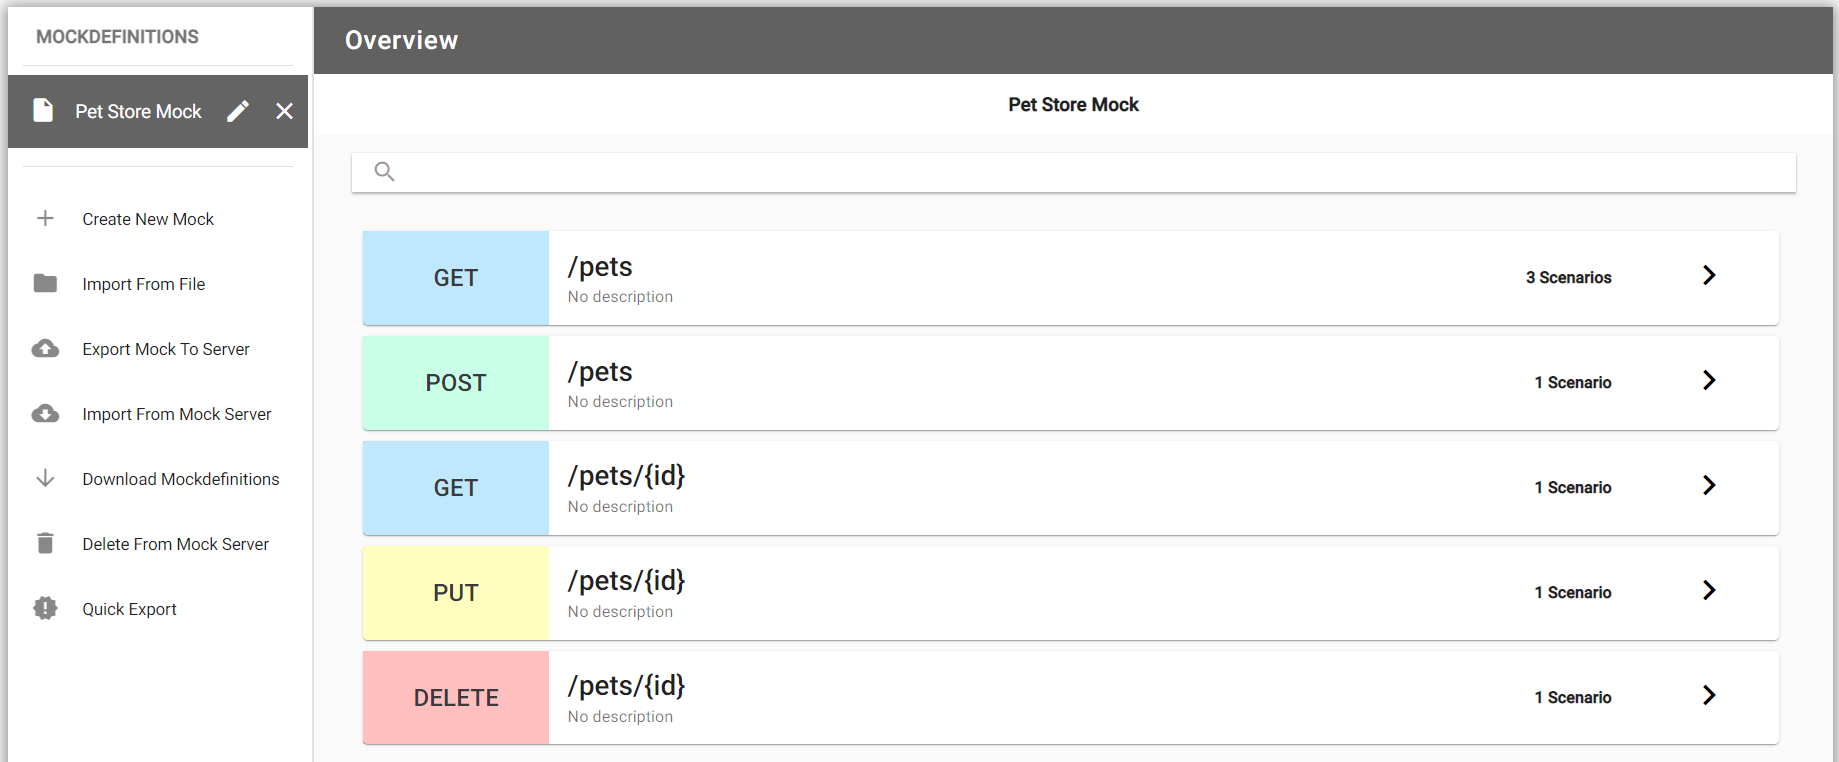
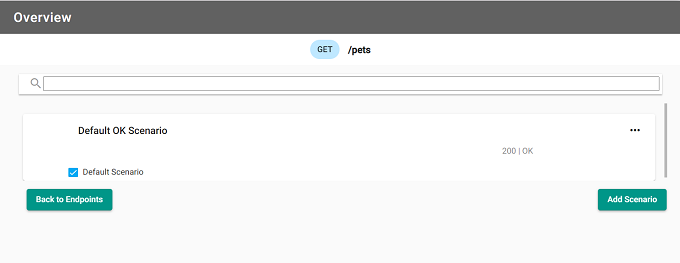
Select the endpoint to add a scenario, or update an existing one. The following image shows a default scenario, let’s add “Header match rules” scenario for for /pets:
Adding a header match rule
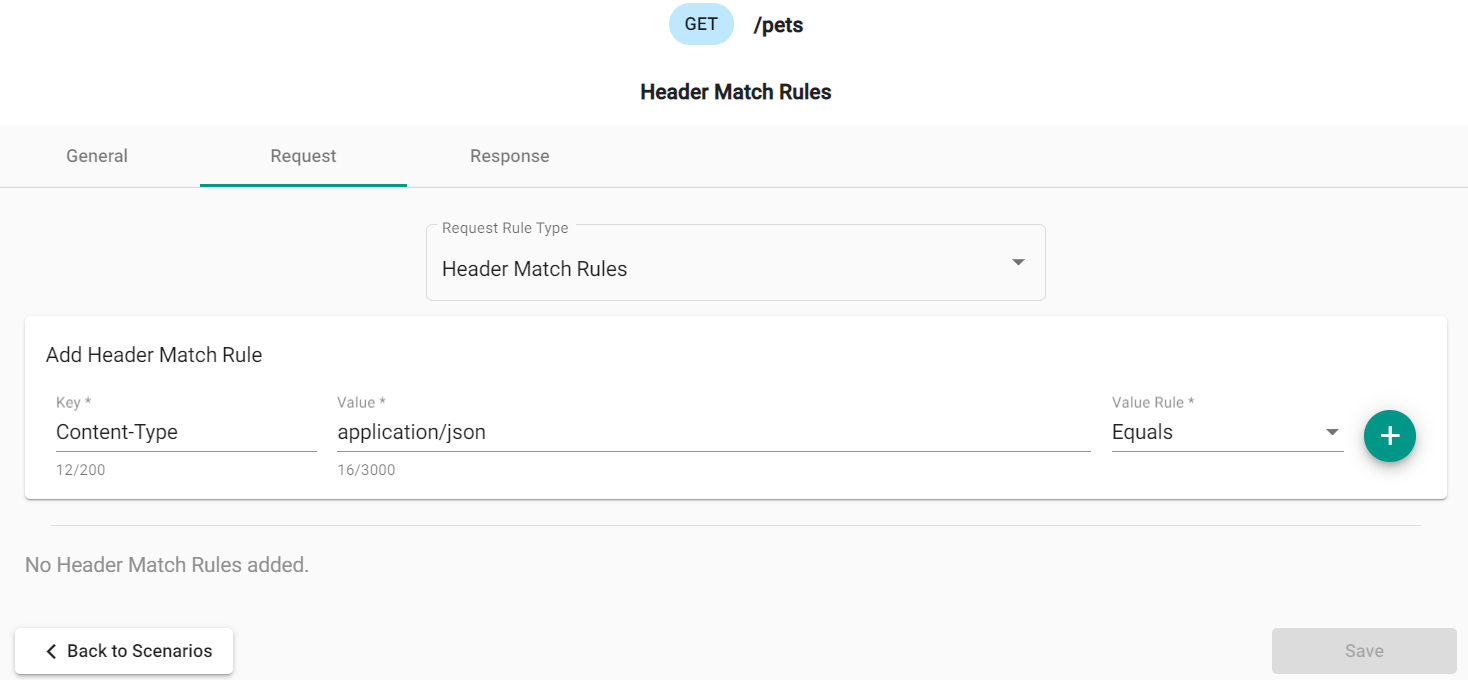
In “Header match rules” scenario select a “Request” tab and chose a “Header Match Rules” option from the “Request Rule Type” dropdown menu. The image shows the example of key value pair of Content-Type and application/json with the rule type of Equals for the scenario. This rule will check request headers to ensure they match. Click + button to add the rule.
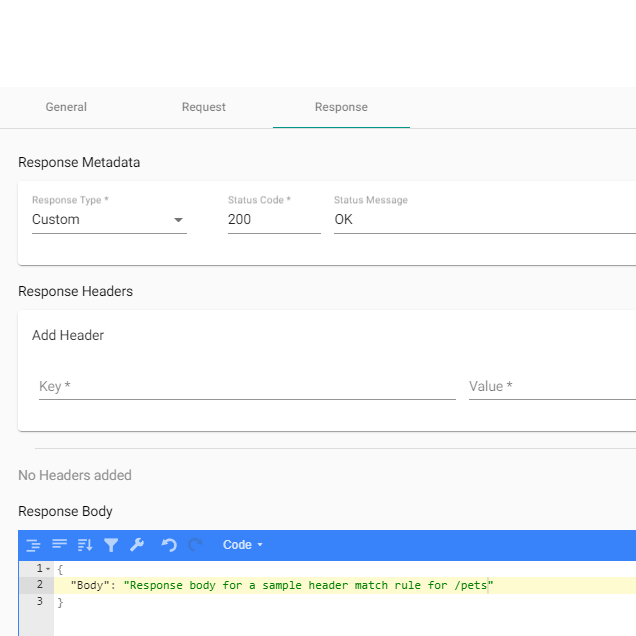
Once a request rule have been added, you will need to also add a response. Select “Response” tab. The response includes
the response type (by default Custom), status code (by default - 200), an optional header, and the JSON body "body": "Response body for Header match rule" of the response. The following image shows the example of the response:
Clicking “Save” adds new response to scenario.